Subtotal $0.00


Email :203
Let me introduce you to what I consider the best coffee maker ever – the Keurig K150 with an auto-refill water tank. This upgrade has truly been a game-changer in my kitchen, and I can’t wait to share why it’s so fantastic.
A Coffee Maker That Solves the Water Refilling Hassle
If you’re like me and enjoy a large cup of coffee – around 16 oz – you probably understand the hassle of constantly refilling your coffee maker’s water tank. For me, having to refill my Keurig after just two cups was incredibly annoying, especially when I had guests over who also wanted coffee. But the Keurig K150 completely changed the game by offering an auto water fill option.
Now, I know what you’re thinking: auto-refill coffee makers are either built into the refrigerator door or are incredibly expensive. That’s exactly what I thought, too, until I found out that there’s an affordable solution available. The Keurig K150 allows you to replace the standard water reservoir with an auto-fill version that directly connects to your water supply, making the refilling issue a thing of the past.
How It Works
The Keurig K150 itself doesn’t come with the auto-fill feature, but you can purchase an auto-fill water reservoir that’s specifically designed for this model. The auto-fill reservoir doesn’t include a charcoal filter, so you’ll need to buy one separately.
If you want an even simpler setup, placing your coffee maker near your refrigerator allows you to connect it directly to your refrigerator’s water line using a T fitting. However, due to space limitations in my kitchen, I had a plumber run a water line from the kitchen sink to my new Keurig’s location. The water line comes up from the floor behind my wall ovens and runs through a small hole in the cabinet behind the microwave to the coffee maker.
A Seamless Setup
Although the water line is visible in the photos, it blends in so well that it’s hardly noticeable. If you decide to connect your coffee maker to the ice maker line, the process is even easier. Simply place the water filter between the ice maker line and the coffee maker’s connection, securing it to the wall behind the refrigerator.
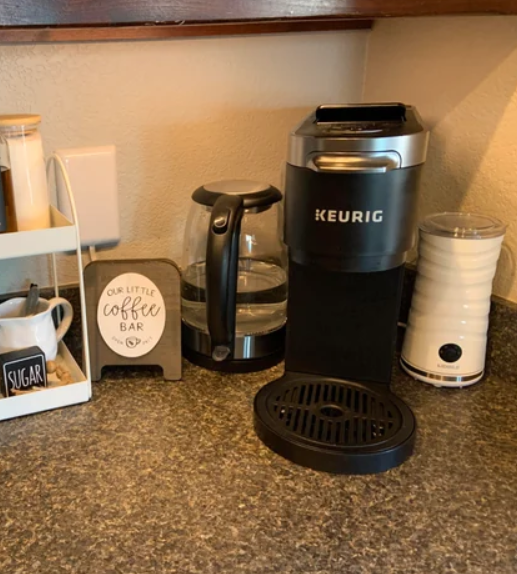
A Fresh Look for My Coffee Bar
With my new coffee maker in place, it was time to refresh my coffee bar. I kept the decor simple and neutral, which allows me to easily switch up the color scheme for different seasons. I added a tiered tray filled with black and white mugs, along with a charming little sugar bowl and creamer. A small, squat pitcher holds a mix of new and vintage spoons, completing the cozy, functional space.